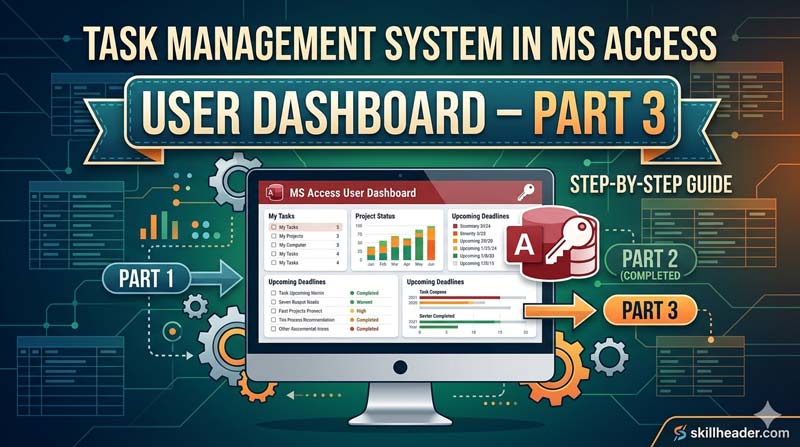
Building a fully functional Task Management System in Microsoft Access? In Part 3 of this series, we take things to the next level. This tutorial walks you through integrating the Admin Dashboard with the Login form, building out the User Dashboard with powerful features like “Make Task Complete,” open/closed task switching, a refresh button, live header stats, and a grouped task view all inside Microsoft Access.
Whether you are a beginner or an intermediate Access developer, this guide covers every step clearly so you can follow along and build it yourself.
What You Will Build in This Tutorial
By the end of this guide, your Task Management System will have:
- A Logout and Exit button with proper VBA code
- A fully integrated Admin Dashboard connected to the Login form
- A User Dashboard form with task data and a “Make Task Complete” button
- An Option Group to switch between Open and Closed tasks
- A Refresh button to reload form data on demand
- An Admin Dashboard header showing today’s tasks, current month tasks, and completed tasks
- A Tasks Group Form for organized task display
Let’s go through each part step by step.
Step 1 – Add Logout and Exit Code
The first thing covered in this tutorial is writing the VBA code for the Logout and Exit buttons. These are essential for any multi-user system where people need to safely leave the application.
Logout Button Code
The Logout button should close the current dashboard and return the user to the Login form. Here is how you write that in VBA:
vba
Private Sub btnLogout_Click()
    DoCmd.Close acForm, Me.Name
    DoCmd.OpenForm "frmLogin"
End Sub
This closes the currently open form and reopens the Login form. It does not shut down the application — it simply returns the user to the start.
Exit Button Code
The Exit button should close the entire Microsoft Access application:
vba
Private Sub btnExit_Click()
    Application.Quit
End Sub
You can also add a confirmation message box before quitting, which is a good practice for user experience:
vba
Private Sub btnExit_Click()
    If MsgBox("Are you sure you want to exit?", vbYesNo + vbQuestion, "Exit") = vbYes Then
        Application.Quit
    End If
End Sub
Place these buttons clearly on your dashboard header so users can find them easily.
Step 2 – Integrate the Admin Dashboard with the Login Form
Now that the Logout/Exit code is in place, the next step is making sure the Admin Dashboard opens correctly from the Login form — and only when the right credentials are entered.
How the Login Form Directs Users
Your Login form should already have a table storing usernames, passwords, and user roles (Admin or User). The VBA on the Login button checks the role and opens the correct dashboard:
vba
Private Sub btnLogin_Click()
    Dim rs As Recordset
    Dim strSQL As String

    strSQL = "SELECT * FROM tblUsers WHERE Username='" & Me.txtUsername & "' AND Password='" & Me.txtPassword & "'"
    Set rs = CurrentDb.OpenRecordset(strSQL)

    If rs.EOF Then
        MsgBox "Invalid username or password.", vbCritical, "Login Failed"
    Else
        If rs!UserRole = "Admin" Then
            DoCmd.OpenForm "frmAdminDashboard"
        Else
            DoCmd.OpenForm "frmUserDashboard"
        End If
        DoCmd.Close acForm, "frmLogin"
    End If

    rs.Close
    Set rs = Nothing
End Sub
This is a clean and simple integration. Admins go to the Admin Dashboard. Regular users go to the User Dashboard. The Login form then closes itself.
Tip: Make sure you have a UserRole field in your tblUsers table with values like "Admin" and "User" before running this code.
Step 3 – Build the User Dashboard Form
The User Dashboard is what regular (non-admin) users see after logging in. It shows them their assigned tasks and lets them interact with those tasks.
Setting Up the Form
- Go to Create > Form Design in Access.
- Name the form
frmUserDashboard. - Set the Record Source to your tasks table (e.g.,
tblTasks), filtered by the logged-in user.
To filter tasks by the current logged-in user, you can use a query as the record source:
sql
SELECT * FROM tblTasks WHERE AssignedTo = Forms!frmLogin!txtUsernameOr you can set it dynamically in the form’s On Load event:
vba
Private Sub Form_Load()
    Me.RecordSource = "SELECT * FROM tblTasks WHERE AssignedTo = '" & TempVars!CurrentUser & "'"
End Sub
Using TempVars to store the logged-in username is a great practice across multi-form applications.
Add the “Make Task Complete” Button
This is one of the most useful features in the User Dashboard. When a user finishes a task, they click this button to mark it as complete.
Add a button to the form and write the following VBA:
vba
Private Sub btnComplete_Click()
    If IsNull(Me.TaskID) Then
        MsgBox "Please select a task first.", vbInformation
        Exit Sub
    End If

    If MsgBox("Mark this task as complete?", vbYesNo + vbQuestion, "Confirm") = vbYes Then
        CurrentDb.Execute "UPDATE tblTasks SET Status='Closed', CompletedDate=Date() WHERE TaskID=" & Me.TaskID
        Me.Requery
        MsgBox "Task marked as complete!", vbInformation
    End If
End Sub
This updates the task’s Status field to "Closed" and records today’s date as the CompletedDate. After updating, it reloads the form data using Me.Requery.
Make sure your tblTasks table has both a Status field (text) and a CompletedDate field (Date/Time).
Step 4 – Add an Option Group to Switch Between Open and Closed Tasks
An Option Group gives users a simple way to switch their task view between Open and Closed tasks without needing to navigate anywhere else.
Creating the Option Group
- In Form Design view, go to the Design tab and click Option Group in the Controls section.
- Draw it on the form.
- The wizard will appear — add two options: Open Tasks (value 1) and Closed Tasks (value 2).
- Name the Option Group
grpTaskFilter.
Writing the Filter Code
Now write VBA that filters the form’s records based on which option the user selects:
vba
Private Sub grpTaskFilter_AfterUpdate()
    If Me.grpTaskFilter = 1 Then
        Me.Filter = "Status = 'Open' AND AssignedTo = '" & TempVars!CurrentUser & "'"
    Else
        Me.Filter = "Status = 'Closed' AND AssignedTo = '" & TempVars!CurrentUser & "'"
    End If
    Me.FilterOn = True
End Sub
When the user clicks Open Tasks, the form shows only open tasks. When they click Closed Tasks, it switches to completed ones. This is clean, fast, and requires no extra forms or navigation.
Default selection tip: Set the Option Group’s default value to 1 so Open Tasks are shown first when the form loads.
Step 5 – Add a Form Refresh Button
A Refresh button is a simple but important feature. It lets users reload the form data without closing and reopening the form — useful when tasks are being updated by others in a shared database.
Add a button named btnRefresh and write:
vba
Private Sub btnRefresh_Click()
    Me.Requery
End Sub
That’s it. Me.Requery re-runs the form’s record source query and pulls in any new or updated data. You can also combine it with resetting the Option Group filter:
vba
Private Sub btnRefresh_Click()
    Me.grpTaskFilter = 1
    Me.Filter = "Status = 'Open' AND AssignedTo = '" & TempVars!CurrentUser & "'"
    Me.FilterOn = True
    Me.Requery
End Sub
This resets the view to Open Tasks and refreshes the data in one click.
Step 6 – Build the Admin Dashboard Header with Task Stats
The Admin Dashboard header is where administrators get a quick overview of how tasks are progressing. This section shows three important numbers:
- Tasks Added Today
- Tasks Added This Month
- Tasks Completed This Month
These are displayed using unbound text boxes with DCount expressions — no extra queries needed.
Tasks Added Today
Add a text box and set its Control Source to:
=DCount("*","tblTasks","Format(DateAdded,'yyyy-mm-dd')=Format(Date(),'yyyy-mm-dd')")This counts every task where the DateAdded field matches today’s date.
Current Month Tasks
=DCount("*","tblTasks","Month(DateAdded)=Month(Date()) And Year(DateAdded)=Year(Date())")This counts all tasks added in the current calendar month and year.
Completed Tasks Within a Month
=DCount("*","tblTasks","Status='Closed' And Month(CompletedDate)=Month(Date()) And Year(CompletedDate)=Year(Date())")This counts tasks that have been marked as Closed with a CompletedDate in the current month.
Styling the Header
Place these three text boxes side by side in a header section of the Admin Dashboard. Label each one clearly:
- 📋 Tasks Added Today
- 📅 This Month’s Tasks
- ✅ Completed This Month
Give each box a distinct background color and large, bold font so the numbers are easy to read at a glance. This turns your admin header into a live mini-dashboard.
Step 7 – Create the Tasks Group Form
The Tasks Group Form organizes tasks visually by grouping them — for example by status, priority, or assigned user. This gives admins a cleaner way to browse all tasks rather than scrolling through a flat list.
Setting Up the Form
- Create a new form in Design view named
frmTasksGroup. - Set its Default View to Continuous Forms — this lets multiple records show in a list layout.
- Set the Record Source to a query that orders tasks by the field you want to group by:
sql
SELECT * FROM tblTasks ORDER BY Status, DateAdded DESCAdding a Group Header Using a Subform Approach
For true grouping (like a header for “Open” followed by all open tasks, then a header for “Closed”), use a main form with a subform:
- The main form loops through status values (Open, Closed)
- The subform (
frmTasksGroupSub) filters tasks by that status
Or more simply, use a Continuous Form with a visible Status label next to each record and apply conditional formatting to color-code each group.
Conditional Formatting by Status
Select the Status field on the form, go to Format > Conditional Formatting, and set:
- If value equals
"Open"→ Background: Light Blue - If value equals
"Closed"→ Background: Light Green
This creates a clear visual distinction between task groups without needing complex subform logic.
Opening the Tasks Group Form from the Admin Dashboard
Add a button on the Admin Dashboard:
vba
Private Sub btnViewTasks_Click()
    DoCmd.OpenForm "frmTasksGroup"
End Sub
Putting It All Together
Here is a summary of everything built in this tutorial:
| Feature | Form | Method Used |
|---|---|---|
| Logout button | Admin & User Dashboard | DoCmd.Close + DoCmd.OpenForm |
| Exit button | Admin & User Dashboard | Application.Quit |
| Login integration | frmLogin | VBA role check + DoCmd.OpenForm |
| User Dashboard | frmUserDashboard | Filtered record source by user |
| Make Task Complete | frmUserDashboard | UPDATE SQL + Me.Requery |
| Open/Closed toggle | frmUserDashboard | Option Group + Me.Filter |
| Refresh button | frmUserDashboard | Me.Requery |
| Today’s tasks count | frmAdminDashboard | DCount with Date() |
| This month’s tasks | frmAdminDashboard | DCount with Month() |
| Completed this month | frmAdminDashboard | DCount with Status + Month |
| Tasks group view | frmTasksGroup | Continuous form + conditional formatting |
Final Tips for a Better Task Management System
- Always use TempVars to store the logged-in username across forms — it avoids referring to closed forms.
- Test your DCount expressions in the Immediate Window (
Ctrl + G) before placing them on forms. - Add error handling to all VBA buttons using
On Error GoToto avoid runtime crashes. - Back up your database regularly during development — use File > Save As > Back Up Database.
- Use a startup form (set in Access Options) so the Login form opens automatically when the database is launched.
Conclusion
This tutorial shows how much you can accomplish in Microsoft Access with the right combination of forms, VBA, and SQL. By the end of Part 3, your Task Management System has a working login flow, a user-facing dashboard with task controls, a live admin stats header, and a grouped task view — all built without any external tools or add-ins.
If you followed along with Part 1 (database and login setup) and Part 2 (admin dashboard basics), this final piece brings everything together into a fully working system that you can use for real projects.
Watch the full video here: Task Management System in Access | User Dashboard Part 3
Have questions about a specific step? Drop a comment on the video or leave a message below. And if this guide helped you, share it with someone learning Microsoft Access!
Tutorial by Skill Header — The Ultimate IT Skills & Trending Tech Platform. Empowering students, job holders, and businesses to master in-demand digital skills.