A complete, step-by-step guide to duration calculation, task buttons, queries, conditional formatting, time tracking, and more in Microsoft Access.
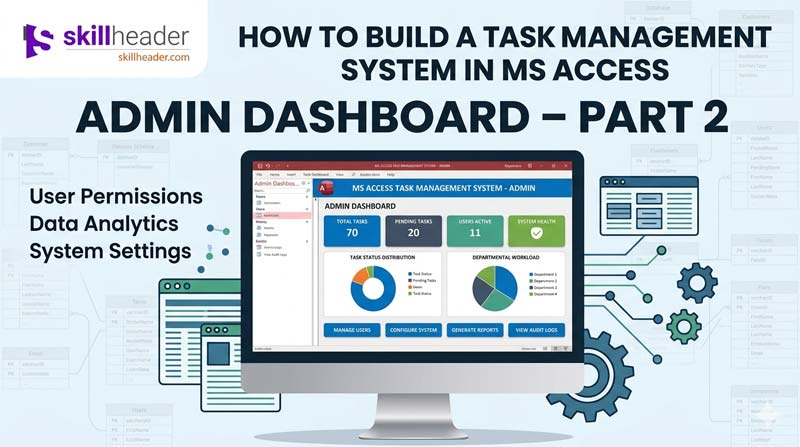
If you have already built the basic structure of your Task Management System in Microsoft Access, it is time to make it actually work. In Part 2 of this Admin Dashboard series, you will add the features that turn a plain form into a fully functional task tracker — one that calculates deadlines, highlights urgency with color, shows how much time is left on each task, and lets you add, edit, or delete tasks with just a click.
This guide walks through every step covered in the video, in plain language, so you can follow along even if you are not a VBA expert.
What You Will Build in This Part
By the end of this tutorial, your Access dashboard will be able to:
- Calculate task duration in days, hours, and minutes using the Expression Builder
- Open a “New Task” form through a working button with VBA code
- Display only open/active tasks in a subform using a filtered query
- Color-code tasks by priority — red for urgent, orange for important, green for regular
- Calculate and display the percentage of time remaining on each task
- Show a visual data bar in the Time Left column
- Let users edit an existing task and save changes
- Delete a task with a confirmation prompt
Let’s go through each one step by step.
Step 1: Calculate Task Duration Using the Expression Builder
The first thing you want your dashboard to show is how long each task is supposed to take — in a readable format like “2 days, 4 hours, 30 minutes.”
Microsoft Access does not store this automatically. You have to calculate it from the Start Date and Due Date fields using the Expression Builder.
How to Open the Expression Builder
- Open your form or query in Design View.
- Click on the text box or field where you want the duration to appear.
- In the Property Sheet, click the Control Source box.
- Click the small button with three dots (…) that appears on the right. This opens the Expression Builder.
Writing the Duration Expression
In the Expression Builder, you will use the DateDiff function three times — once for days, once for hours, and once for minutes — and combine them into one readable string.
Here is the expression you need:
Duration: DateDiff("d",[StartDate],[DueDate]) & " days, " &
DateDiff("h",[StartDate],[DueDate]) Mod 24 & " hrs, " &
DateDiff("n",[StartDate],[DueDate]) Mod 60 & " mins"
What each part does:
DateDiff("d", ...)— calculates the total difference in daysDateDiff("h", ...) Mod 24— gets the leftover hours after full days are removedDateDiff("n", ...) Mod 60— gets the leftover minutes after full hours are removed- The
&operator joins everything together into one readable line
Once you click OK and switch to Form View, the Duration field will display something like: 3 days, 6 hrs, 45 mins
Tip: Make this field read-only by setting its Enabled property to No and Locked to Yes. You do not want users editing a calculated result.
Step 2: Add a Working “New Task” Button with VBA
A button that does nothing is just decoration. Here is how to make your New Task button actually open a blank form where users can enter a new task.
Place the Button on the Form
- In Design View, go to the Design tab and click Button under Controls.
- Draw the button on your form where you want it.
- When the wizard appears, click Cancel — you will write the code yourself for full control.
- Right-click the button and select Properties.
- Give it a clear name like
btnNewTaskand set its Caption to “New Task” (or use an icon if you prefer).
Write the VBA Code
- With the button selected, go to the Event tab in the Property Sheet.
- Click on On Click and choose [Event Procedure].
- Click the three-dot button to open the VBA editor.
Write this code:
vba
Private Sub btnNewTask_Click()
    DoCmd.OpenForm "frmTaskEntry", acNormal, , , acFormAdd
End Sub
What this does:
DoCmd.OpenForm— tells Access to open a form"frmTaskEntry"— the name of your task entry form (change this to match your actual form name)acNormal— opens it as a regular windowacFormAdd— opens the form in data entry mode so it shows a blank record, ready for input
Save the VBA editor, close it, and test your button in Form View. Clicking it should open a fresh, empty task form.
Step 3: Build an “Open Status” Query for the Subform
Your dashboard subform should only show tasks that are still active — not completed ones. To do this, you create a query with a filter on the Status field.
Create the Query
- Go to the Create tab and click Query Design.
- Add your main task table (for example,
tblTasks). - Add all the fields you want to show in the subform: Task Name, Assigned To, Due Date, Priority, Status, Time Left, etc.
- In the Criteria row under the Status field, type:
"Open"This tells Access to only include records where Status equals “Open”.
- Save the query with a clear name like
qryOpenTasks.
Link the Query to Your Subform
- Open the main dashboard form in Design View.
- Click on the subform control.
- In the Property Sheet, go to Data and set the Record Source to
qryOpenTasks.
Now the subform will only ever show tasks with an Open status. Completed tasks disappear automatically as soon as their status is updated.
Step 4: Apply Conditional Formatting by Priority (Red, Orange, Green)
Color-coding is one of the most useful features you can add to any dashboard. In this system, you will highlight the Conditions (Priority) column with:
- 🔴 Red = Urgent
- 🟠 Orange = Important
- 🟢 Green = Regular
How to Set Up Conditional Formatting
- Open the subform in Design View.
- Click on the Conditions field (the text box that shows the priority level).
- Go to Format in the top menu and click Conditional Formatting — or right-click the field and choose it from the context menu.
- The Conditional Formatting Rules Manager opens. Click New Rule.
Rule 1 — Urgent (Red)
- Rule type: Field Value Is
- Condition: equal to → type
"Urgent" - Set the background color to Red
- Set the font color to White (for readability)
- Click OK
Rule 2 — Important (Orange)
- Click New Rule again
- Condition: equal to →
"Important" - Background: Orange
- Font: White or Black
- Click OK
Rule 3 — Regular (Green)
- Click New Rule again
- Condition: equal to →
"Regular" - Background: Green
- Font: White or Black
- Click OK
Click Apply, then OK. Switch to Form View — your priority column will now light up with the correct color for every task.
Note: The field values must match exactly. If your data uses “High” instead of “Urgent,” update the rule conditions to match.
Step 5: Calculate the Time Left Percentage
The Time Left field shows how much of a task’s total time window still remains, expressed as a percentage. This is very useful for at-a-glance progress tracking.
The formula compares today’s date to the task’s start and due dates:
The Expression
In the Expression Builder (or directly in the Control Source of the Time Left text box), enter:
TimeLeft: IIf(
  DateDiff("n", [StartDate], [DueDate]) = 0,
  0,
  (DateDiff("n", Date(), [DueDate]) / DateDiff("n", [StartDate], [DueDate])) * 100
)
Breaking it down:
DateDiff("n", [StartDate], [DueDate])— total minutes from start to due date (the full window)DateDiff("n", Date(), [DueDate])— minutes from right now to the due date (what’s remaining)- Dividing remaining by total and multiplying by 100 gives the percentage left
- The
IIfprevents a divide-by-zero error if Start and Due dates are the same
Set the Format property of this field to 0 or 0% to display it cleanly, and consider limiting it with a Min/Max so it does not show negative numbers when overdue (you can wrap with IIf(result < 0, 0, result)).
Step 6: Add a Data Bar Formatting Rule for the Time Left Column
A data bar turns your percentage number into a visual progress bar right inside the cell — making it even easier to read at a glance. Access supports this through conditional formatting.
Set Up the Data Bar
- In Design View of the subform, click on the Time Left text box.
- Go to Format → Conditional Formatting.
- Click New Rule.
- Under Rule Type, select Compare to other records (or use an expression depending on your Access version).
- Choose Data Bar as the format type.
- Set the Minimum value to
0and Maximum to100. - Choose a bar color — blue is common, but green works well for remaining time.
- Click OK and Apply.
Now each task row in the subform will display a horizontal bar that shrinks as the deadline approaches. A task at 80% time remaining shows a nearly full bar; a task at 10% shows a thin sliver.
Note: The Data Bar option is available in Access 2010 and later. If you are on an older version, you can simulate it with color ranges using standard conditional formatting rules.
Step 7: Build the Edit Task Button and Process
Clicking Edit Task should open the task record for the currently selected row so the user can make changes and save them.
Add the Button
Place a button in or near the subform, name it btnEditTask, and set its Caption to “Edit Task.”
Write the VBA Code
vba
Private Sub btnEditTask_Click()
    Dim taskID As Long

    If IsNull(Me.subTaskList.Form.TaskID) Then
        MsgBox "Please select a task to edit.", vbInformation
        Exit Sub
    End If

    taskID = Me.subTaskList.Form.TaskID

    DoCmd.OpenForm "frmTaskEntry", acNormal, , "[TaskID] = " & taskID, acFormEdit
End Sub
What this does:
Me.subTaskList.Form.TaskID— reads the TaskID of the record selected in the subform (replacesubTaskListwith your subform’s actual control name)- The
IsNullcheck shows a message if no row is selected DoCmd.OpenFormopens the task form filtered to that specific recordacFormEditopens it in edit mode (not data-entry mode)
When the user saves changes in frmTaskEntry and closes it, the subform refreshes to show the updated data. You can add Me.subTaskList.Requery in the frmTaskEntry Close event to trigger a refresh automatically.
Step 8: Add the Delete Task Button and Confirmation
Deletion should always ask for confirmation. Here is how to build a safe, clean delete button.
Add the Button
Place a button on the form, name it btnDeleteTask, and set its Caption to “Delete Task.”
Write the VBA Code
vba
Private Sub btnDeleteTask_Click()
    Dim taskID As Long
    Dim response As Integer

    If IsNull(Me.subTaskList.Form.TaskID) Then
        MsgBox "Please select a task to delete.", vbInformation
        Exit Sub
    End If

    response = MsgBox("Are you sure you want to delete this task? This cannot be undone.", _
                      vbYesNo + vbQuestion, "Confirm Delete")

    If response = vbYes Then
        taskID = Me.subTaskList.Form.TaskID

        CurrentDb.Execute "DELETE FROM tblTasks WHERE TaskID = " & taskID, dbFailOnError

        Me.subTaskList.Requery

        MsgBox "Task deleted successfully.", vbInformation
    End If
End Sub
What each section does:
- The first
Ifblock checks that a task is actually selected MsgBoxwithvbYesNoshows a confirmation dialog — users must click Yes to proceedCurrentDb.Executeruns a SQL DELETE statement directly against the tableMe.subTaskList.Requeryrefreshes the subform so the deleted task disappears immediately- A final MsgBox confirms the deletion was successful
This is much safer than letting Access delete records automatically, because it gives the user one last chance to back out.
Putting It All Together
Here is a quick summary of everything you have built in this part:
| Feature | Method Used |
|---|---|
| Duration calculation | Expression Builder with DateDiff |
| New Task button | VBA with DoCmd.OpenForm (acFormAdd) |
| Open tasks subform | Query with Status = “Open” as criteria |
| Priority color coding | Conditional Formatting rules (3 rules) |
| Time Left percentage | Expression Builder with DateDiff calculation |
| Data bar visualization | Conditional Formatting → Data Bar |
| Edit Task button | VBA with DoCmd.OpenForm (acFormEdit) |
| Delete Task button | VBA with confirmation MsgBox + SQL DELETE |
Common Mistakes to Avoid
Date field names must match exactly. If your table uses DueDate but your expression says Due_Date, Access will throw an error. Always check the exact field name in your table design.
Subform control name vs. form name. When referencing the subform in VBA, use the control name (what the subform container is called on the main form), not the name of the subform itself. These are often different.
Requery after changes. Any time you add, edit, or delete a record through VBA or a linked form, call .Requery on the subform to refresh it. Otherwise the display will be out of date.
Conditional formatting is case-sensitive. If your data has “urgent” (lowercase) but your rule checks for “Urgent” (capitalized), the color will not apply. Make sure your data entry form forces consistent capitalization, or use UCase() in the rule expression.
Final Thoughts
With these eight features in place, your Microsoft Access Task Management System now works like a real application — not just a database table. Tasks are color-coded, deadlines are visible at a glance, and users can add, edit, or remove records through clean, simple buttons.
In the next part of this series, you can take things further by adding reporting, user login, or email notifications. But for now, you have a fully working admin dashboard that any small team can use right away.
If you found this guide useful, watch the full video — “Task Management System in Access | Admin Dashboard Part 2” — to see each step demonstrated live. The video shows exactly where to click and what the finished result looks like, which makes it much easier to follow if you get stuck anywhere.
Keywords: MS Access task management system, Microsoft Access admin dashboard, Access expression builder DateDiff, conditional formatting Access form, VBA new task button Access, Access subform query filter, delete record VBA Access, data bar Access conditional formatting, time left percentage Access, edit task button VBA
Tutorial by Skill Header — The Ultimate IT Skills & Trending Tech Platform. Empowering students, job holders, and businesses to master in-demand digital skills.