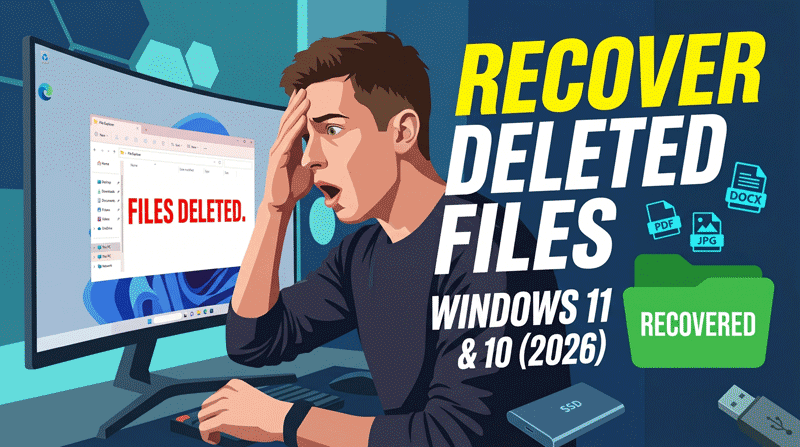
Let me paint you a picture. It’s 11 PM. You’re cleaning up your desktop, deleting random junk files — and then your stomach drops. That wasn’t a junk file. That was the report you’ve been working on for three days. Or the wedding photos you just transferred from your camera. Or your entire project folder.
Yeah. We’ve all been there.
Here’s the good news: deleted doesn’t always mean gone. Windows is surprisingly forgiving when it comes to deleted files — if you act fast and know the right tools. This guide walks you through every method, from the ridiculously simple (check the Recycle Bin, seriously) to the more advanced recovery software that works like digital archaeology.
Let’s get your files back.
First Things First — Stop Using Your Computer Right Now
Before we dive into any method, this is the single most important thing you need to understand:
Good to know
When Windows “deletes” a file, it doesn’t actually erase the data immediately. It just marks that storage space as available for future use.
That means your file is still physically on the drive — invisible but recoverable — until something new overwrites it. Every time you download something, install a program, or even just browse the web, you risk overwriting that space.
So if you’ve just deleted something important:
Then come back here and follow these steps.
Method 1: Check the Recycle Bin (The Obvious One You Might Have Missed)
Look, I’m not judging. Sometimes panic makes us skip the simplest solution.
How to recover files from the Recycle Bin in Windows:
1
Double-click the Recycle Bin icon on your desktop
2
Find the file(s) you want to recover — you can sort by name, date deleted, or original location
3
Right-click the file → Restore
That’s it. The file goes right back to where it was.
Tip: If your Recycle Bin is cluttered, use the search bar inside it to find files by name or extension (like .docx or .jpg).
Insert image: Windows Recycle Bin open with the “Restore” option highlighted in the right-click menu.
Method 2: Use File History to Restore Previous Versions
Windows has a built-in backup feature called File History that automatically saves copies of your files over time — think of it like a time machine for your documents.
How to use File History to restore deleted files in Windows 10/11:
1
Go to Settings → Update & Security → Backup
2
Under “Back up using File History,” click More options
3
Scroll down and click Restore files from a current backup
4
Navigate through your folder history to find the version you want
5
Hit the green Restore button
Important note: File History only works if it was set up before the deletion. If you haven’t enabled it yet — set it up right after reading this guide. Future-you will thank present-you enormously.
Alternatively, you can right-click any folder → Properties → Previous Versions to see restore points created by Windows or backup tools.
Method 3: Windows File Recovery (Microsoft’s Official Command-Line Tool)

Microsoft built a free recovery tool called Windows File Recovery, available in the Microsoft Store. It’s command-line based — which sounds scary, but it’s actually pretty straightforward once you see the syntax.
When to use it: After emptying the Recycle Bin, or when files were deleted from an external drive or SD card.
How to use Windows File Recovery:
- Download Windows File Recovery from the Microsoft Store
- Open Command Prompt as Administrator (search “cmd” → right-click → Run as administrator)
- Use this basic syntax:
winfr C: D: /regular /n \Users\YourName\Documents\filename.docx
Replace C: with the source drive, D: with your recovery destination, and fill in the file path.
Common modes:
| Mode | Best For |
|---|---|
/regular | Recently deleted files from NTFS drives |
/extensive | Files deleted a while ago or from formatted drives |
/segment | Corrupted drives with damaged file records |
Pro tip: Always recover to a different drive than the one you’re recovering from. Recovering to the same drive is like trying to mop up a spill while the tap is still running.
Method 4: Recover Deleted Files Using Third-Party Software

When built-in tools aren’t enough — especially for formatted drives, older deletions, or trickier situations — third-party recovery software steps in.
Here’s a breakdown of the best options for different needs:
🆓 Best Free Tools
| Tool | Best For | Skill Level |
|---|---|---|
| Recuva (by Piriform) | Everyday deleted files, USB drives | Beginner |
| Puran File Recovery | Lightweight, fast scans | Beginner |
| Windows File Recovery | No-install, built into Windows 10/11 | Intermediate |
Recuva is the fan favorite for good reason. It has a wizard mode that guides you step by step, and a deep scan option for stubborn files. Download it, run it, follow the wizard. Done.
💰 Best Paid/Freemium Tools (For Serious Recovery)
| Tool | Best For | Starting Price |
|---|---|---|
| EaseUS Data Recovery Wizard | Formatted drives, all file types | Free up to 2GB |
| Stellar Data Recovery | Photos, emails, formatted partitions | Free scan |
| Disk Drill | Visual, beginner-friendly interface | Free preview |
| Recoverit by Wondershare | Deep scan, video recovery | Free scan |
| MiniTool Data Recovery | USB, SSD, RAID recovery | Free up to 1GB |
| R-Studio | Advanced RAID/NAS scenarios | Paid |
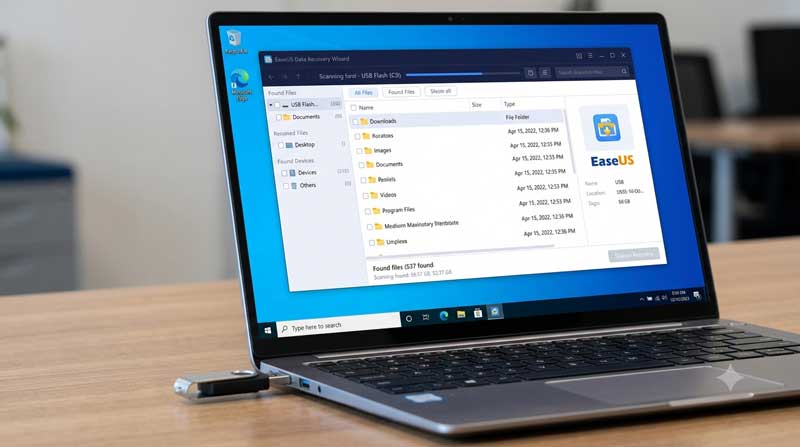
Data Recovery Wizard Screenshots
Tested
Accidentally deleted something important? Whether it’s a formatted drive, a crashed PC, or a wiped SD card — EaseUS can find it. With a 99.7% recovery success rate across 1,000+ file types, it scans deeper than you’d expect and shows you exactly what’s recoverable before you commit. One tool. Every device. Your files back.
My recommendation for most people: Start with Recuva (free). If it doesn’t find your files, try EaseUS or Disk Drill — both offer free scans so you can see if your files are recoverable before paying anything.

Method 5: Recover Deleted Files from External Hard Drive or USB
The same principles apply to external drives — with one key difference. Make sure the drive is still recognized by Windows before attempting recovery.
1
Connect your external drive or USB
2
Open Device Manager to verify it’s detected
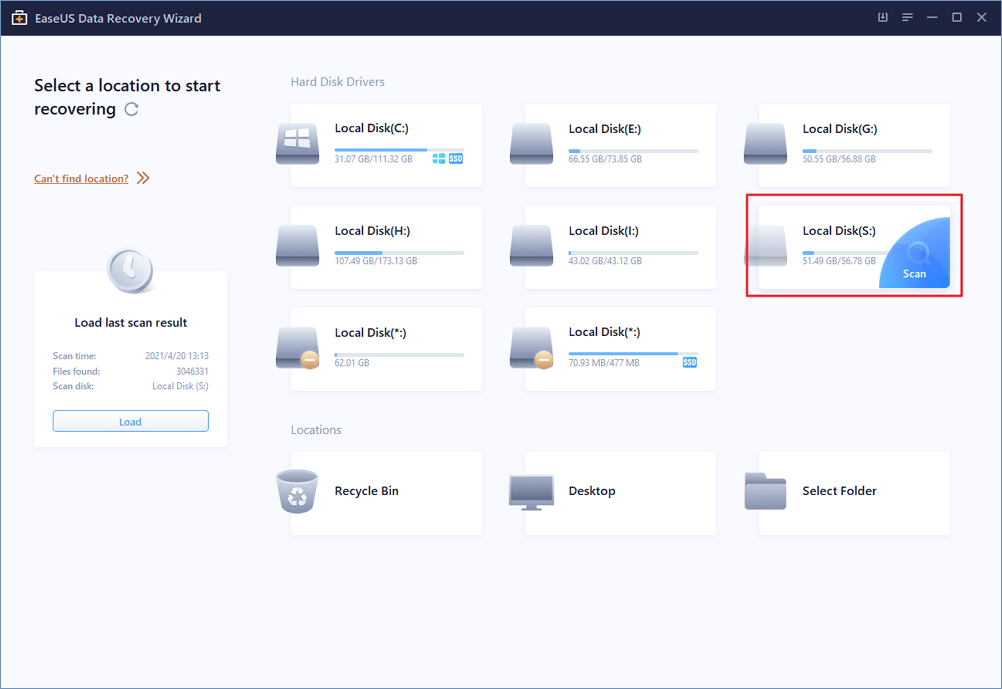
3
Use EaseUS and point the scan at the external drive letter (e.g., E:)
4
Recover to your internal drive (not back to the same external!)
For USB drives specifically: Avoid reformatting the drive even if Windows asks you to. That prompt is Windows being overly helpful — it doesn’t mean the data is gone yet.
Method 6: Recover Deleted Files from a Formatted Drive
This is where things get trickier — but not impossible.
How to recover files from a formatted drive in Windows:
- Stop using the drive immediately — this is non-negotiable
- Download a deep scan tool: EaseUS, Stellar, or Disk Drill are the best for this
- Run a deep/extensive scan on the formatted partition
- Preview recoverable files and restore them to a separate drive
| Tool | Formatted Drive Recovery | Success Rate |
|---|---|---|
| EaseUS Data Recovery Wizard | ✅ Excellent | High |
| Stellar Data Recovery | ✅ Excellent | High |
| Disk Drill | ✅ Good | Medium-High |
| Windows File Recovery | ✅ Use /extensive mode | Medium |
| Recuva | ⚠️ Limited | Low-Medium |
Important
Quick formats are more recoverable than full formats. A quick format just wipes the file table; a full format overwrites the actual data sectors.
Method 7: Recover Specific File Types
Recover Deleted Word or Excel Files
Before reaching for recovery software, check this first:
- AutoRecover: Open Word or Excel → File → Info → Manage Document → Recover Unsaved Documents
- Temp files: Check
C:\Users\YourName\AppData\Local\Microsoft\Office\UnsavedFiles
If those don’t pan out, use EaseUS and filter by .docx or .xlsx extension during the scan.
Recover Deleted Photos and Videos
For photos: Recuva has a dedicated “Pictures” mode. EaseUS and Disk Drill also preview thumbnails during scanning so you can identify the right files visually.
For videos: Videos are larger files and tend to overwrite more quickly — act fast. Recoverit has strong video repair capabilities if files are found but corrupted.
Recover Deleted PDF Files
PDFs are generally very recoverable. Run a scan with any of the tools above and filter by .pdf. Recuva handles these well even in free mode.
FAQ: Your Burning Questions Answered
Can deleted files in Windows actually be recovered?
Yes — more often than you’d think. As long as the storage space hasn’t been overwritten with new data, tools like the Recycle Bin, File History, and recovery software can often pull them back. The key is acting quickly before anything else writes to that drive.
Are permanently deleted files (Shift+Delete) recoverable?
Often yes. When you use Shift+Delete or empty the Recycle Bin, Windows removes the file from its index but the actual data sits on the drive until overwritten. Stop using the drive and run a recovery tool as soon as possible — the sooner you act, the better your chances.
How do I recover deleted files without any software?
Try these native Windows options first:
- Restore from Recycle Bin
- Use File History (Settings → Backup)
- Check Previous Versions via right-click → Properties
- Use the built-in Windows File Recovery tool from the Microsoft Store
Is it safe to recover files to the same drive?
No — and this is important. Always recover to a different drive or partition. Recovering to the same drive risks overwriting the very data you’re trying to save. Use a USB drive, external HDD, or a different internal partition as your recovery destination.
What’s the best free tool to recover deleted files in Windows?
Recuva is the most popular free option for everyday file recovery. For deeper recovery needs, EaseUS Data Recovery Wizard offers 2GB of free recovery, and Disk Drill lets you preview recoverable files for free before committing to a purchase.
Pro Tips to Avoid This Nightmare in the Future
Here’s the thing — the best time to prevent data loss is before it happens. (Yeah, I know. Not helpful right now. But bookmark this for later.)
Set up these protections after you recover your files:
Quick Reference: Which Method Should You Use?
| Situation | Best Method |
|---|---|
| Just deleted (Recycle Bin not emptied) | Restore from Recycle Bin |
| Deleted recently, Recycle Bin emptied | EaseUS or Windows File Recovery |
| Had File History / backups enabled | File History or Previous Versions |
| Files deleted days/weeks ago | EaseUS or Stellar (deep scan) |
| Formatted drive | EaseUS, Stellar, or Disk Drill |
| USB or external drive | Recuva or EaseUS pointed at the drive |
| SSD (act fast!) | Recuva or EaseUS — SSDs overwrite faster |
| After Windows reinstall | EaseUS extensive scan on old partition |
Wrapping Up
Recovering deleted files in Windows isn’t magic — it’s just knowing where to look and having the right tools on hand. Start simple: check the Recycle Bin, try File History, then escalate to Windows File Recovery or third-party software if needed.
The absolute golden rule? The faster you act, the better your chances. Every minute you keep using that drive is a minute closer to permanent loss.
And once you’ve recovered your files — please, please set up a backup system. You don’t want to be in this situation twice.
Got questions about your specific situation? Drop them in the comments below. Have a recovery success story (or horror story)? I’d love to hear it.
Tags: recover deleted files Windows, data recovery Windows 10, Windows File Recovery, recover files after emptying Recycle Bin, EaseUS data recovery, Recuva, file recovery software Windows
Affiliate Disclaimer: This article contains affiliate links, meaning I may earn a commission if you click through and make a purchase, at no extra cost to you.