
You’ve built your database, structured your tables, written your queries, and everything is working well. Now comes a question that almost every Access user runs into: how do you get the data out — into a format other people can actually use?
Most people outside your database world don’t work in Access. They use Excel for analysis and PDF for sharing reports. Being able to export your data into these formats quickly and cleanly is one of those practical skills that makes a real difference to how useful your database actually is day-to-day.
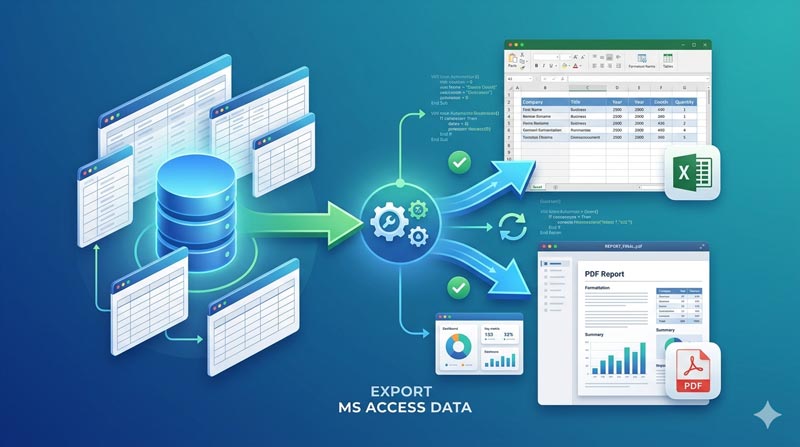
This guide, based on the Skill Header tutorial “Mastering Access Export Data into Excel and PDF,” covers both ways to export — using the built-in menu and using VBA code for a one-click button on your form.
What Can You Export — and in What Format?
Before getting into the how, it’s worth understanding one important rule in Access:
- Tables and Queries export well to Excel (.xls or .xlsx). They contain raw, structured data — rows and columns — which maps naturally to a spreadsheet.
- Reports export best to PDF. Reports in Access have a designed layout — headers, footers, formatting, grouping — that is best preserved as a fixed PDF file, not a spreadsheet.
Keep this in mind as you choose what to export and where.
Method 1: Exporting Using the External Data Menu
This is the manual approach — no code required. It works well for one-off exports when you just need to get data out quickly.
Exporting a Table or Query to Excel
- Open your Access database
- In the left panel, click on the table or query you want to export
- Go to the External Data tab in the ribbon
- Click Excel in the Export group
- A dialog box appears — choose where to save the file and what to name it
- Select your formatting preferences (whether to include formatting and layout, whether to open the file after export, etc.)
- Click OK
Access exports your data to an Excel file at the location you specified. Open it and you’ll see your records laid out exactly as they appear in the table or query — ready for further analysis, filtering, or sharing.
Exporting a Report to PDF
The process is almost identical:
- In the left panel, click on the report you want to export
- Go to the External Data tab
- Click PDF or XPS in the Export group
- Choose a save location and filename
- Adjust page settings if needed (orientation, page size)
- Click Publish
Your report is saved as a PDF, complete with all its formatting, grouping, and layout intact. It looks exactly as it would if you printed it — but as a file you can email, upload, or archive.
Method 2: Exporting Using VBA Code (One-Click Buttons)
The menu method works fine for occasional use, but if you’re exporting regularly — or if your database is used by others who shouldn’t be navigating ribbons and dialogs — automating it with a button is a much better experience.
This is where VBA (Visual Basic for Applications) comes in. You add export buttons to your form and write a small piece of code behind each one. Click the button, the file is exported automatically to a pre-set location. Done.
Setting Up Your Export Folder
Before writing any code, create a dedicated folder where your exported files will be saved. For example, create a folder called ExportFiles on your E drive:
E:\ExportFiles\This is the path your VBA code will reference. You can use any folder on any drive — just make sure it exists before you run the code.
Adding Export Buttons to Your Form
Open your form in Design View and add two command buttons — one for Excel export, one for PDF export. Give them clear labels like Export to Excel and Export to PDF so users know exactly what each one does.
VBA Code: Export a Query to Excel
Right-click the Excel button, go to Build Event, and select Code Builder. In the VBA editor, add the following code:
vba
Private Sub CmdExportExcel_Click()
    QExpoName = "BudgetReport" & ".xls"
    QExpoPath = "E:\ExportFiles\" & QExpoName
    DoCmd.OutputTo acOutputQuery, "BudgetReport", acFormatXLS, QExpoPath, True, , , acExportQualityPrint
End Sub
Here’s what this code does line by line:
- Line 1 sets the filename — in this case
BudgetReport.xls - Line 2 builds the full file path by combining the folder location with the filename
- Line 3 uses
DoCmd.OutputToto export the query namedBudgetReportto Excel format at that path, and opens the file automatically after export (True)
Replace "BudgetReport" with the actual name of your query, and update the folder path to wherever you want the file saved.
VBA Code: Export a Report to PDF
For the PDF button, the code works slightly differently because reports need to be opened (invisibly) before they can be exported:
vba
Private Sub CmdExportPDF_Click()
    Dim reportName As String
    Dim fileName As String

    reportName = "tbl_accounts"
    fileName = "E:\ExportFiles\AccountsReport.pdf"

    DoCmd.OpenReport reportName, acViewPreview, , , acHidden
    DoCmd.OutputTo acOutputReport, reportName, acFormatPDF, fileName
    DoCmd.Close acForm, reportName, acSaveNo
End Sub
Here’s what’s happening:
reportNameandfileNamestore the report name and the destination file pathDoCmd.OpenReportopens the report in Preview mode but keeps it hidden — so it loads the data without showing the report window on screenDoCmd.OutputToexports it as a PDF to the specified file pathDoCmd.Closecloses the report cleanly after exporting
Replace "tbl_accounts" with your actual report name, and update fileName with your preferred save location and filename.
Menu vs VBA — Which Should You Use?
Both methods work. The right choice depends on how your database is used.
| Menu Method | VBA Button | |
|---|---|---|
| Best for | One-off exports | Regular or repeated exports |
| Requires code? | No | Yes (small amount) |
| User-friendly? | Requires ribbon knowledge | One click from a form |
| File location | You choose each time | Pre-set in code |
| Good for shared databases? | Not ideal | Yes |
If you’re the only person using the database and exports are occasional, the menu is perfectly fine. If others use the database, or if you export the same report or query on a regular basis, adding VBA buttons is worth the small upfront effort. It saves time every single time and removes the risk of someone exporting to the wrong place or format.
A Few Practical Tips
Keep your export folder consistent. Whether you’re using the menu or VBA, save to the same folder every time. It makes finding exported files predictable and easy to manage.
Name your files with dates. For exports you run regularly (weekly reports, monthly summaries), add the date to the filename so you don’t overwrite previous exports. In VBA, you can do this with:
vba
QExpoName = "BudgetReport_" & Format(Date, "YYYY-MM-DD") & ".xls"Tables and queries → Excel. Reports → PDF. This is the natural fit in Access. Don’t fight it — work with it.
Test your export paths. If the folder in your VBA code doesn’t exist, the export will fail with an error. Create the folder first, or add error handling to your code to catch this gracefully.
Final Thoughts
Exporting data from Access to Excel and PDF is one of those features that bridges your database with the rest of the world. Whether you’re sending a report to management, sharing data with a colleague who lives in Excel, or archiving monthly records as PDFs — Access makes it straightforward once you know which method to use.
Start with the menu if you’re new to this. Once you find yourself doing the same export repeatedly, write the VBA button — it takes ten minutes to set up and saves you time every week after that.
Watch the full tutorial on YouTube: Mastering Access Export Data into Excel and PDF by Skill Header, and download the practice files at skillheader.com.
Ready for the Next Level?
Congratulations! You’ve learned how to export your Microsoft Access data to Excel and PDF formats. But exporting data is only one part of building efficient database applications.
Now it’s time to take your Access skills further by learning how users can quickly find and filter the information they need. In our next tutorial, Multiple Ways to Search and Filter Records in MS Access Forms (Beginner to Advanced Guide), you’ll discover powerful techniques for creating professional search experiences, from simple text searches to advanced filtering methods.
Keep building, keep learning, and transform your Access databases into professional-grade applications!