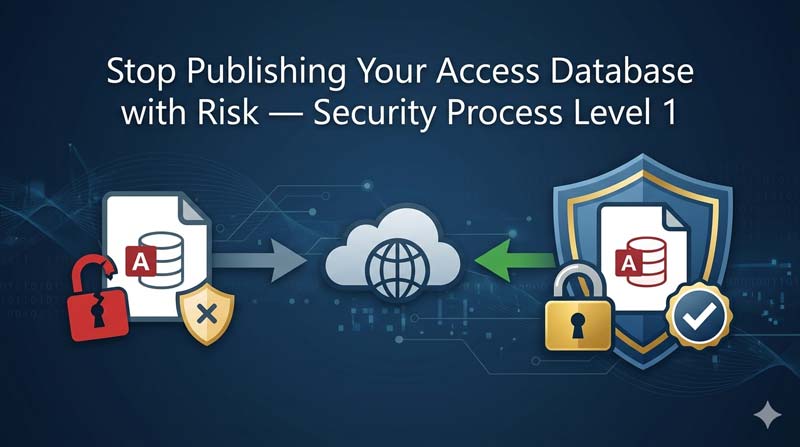
When you publish or share your Microsoft Access database, it is exposed in more ways than most developers realize. Your raw data is open, your VBA code is readable, your forms and objects are editable, and anyone who knows a simple keyboard shortcut can bypass all your protections. This step-by-step guide walks through the exact process shown in the SkillHeader video — from setting a database password in exclusive mode, to splitting the database, to hiding all objects, blocking the Shift key bypass, and understanding what ACCDE conversion does. Follow each step in order and your database will be properly protected before it ever leaves your hands.
Why Every Published Access Database Needs Security Layers
Before we get into the steps, it is worth being clear about what the real risks are. When you share or deploy a Microsoft Access database without any security, here is what any user with basic Access knowledge can do:
- Open your tables directly — viewing, editing, or deleting raw records with no restriction
- Read your VBA code — all your logic, passwords, formulas, and automation are visible in the module editor
- Open forms in Design View — seeing exactly how your interface was built and copying or modifying it
- Delete or rename database objects — breaking your application entirely
- Import your tables into a new blank database — effectively stealing your data structure and all records
- Copy and redistribute your work — months of development can be taken with a single file copy
The goal of this guide is to systematically close each of these gaps, layer by layer, exactly as shown in the SkillHeader video. Each step builds on the previous one — and each one on its own has both strengths and limitations that you need to understand.
Step 1 — Set a Database Password Using Exclusive Mode
🔐 Layer 1: File-Level Protection
The first and most fundamental layer of protection is adding a password to the database file itself. When a password is set, Access also encrypts the raw data inside the file using the AES-256 encryption standard — meaning the file is completely unreadable even if someone opens it with a hex editor or a third-party tool.
Here is the critical detail most people miss: you cannot set a database password the normal way. You must open the database in Exclusive Mode first. This is a special access mode that ensures nobody else has the file open at the same time — because Access needs sole control of the file to apply encryption.
Why Exclusive Mode is required
Access is designed for multi-user environments — multiple people can have the same database open simultaneously. If you tried to encrypt a file that someone else also had open, the encryption could corrupt their session or create data inconsistencies. Exclusive Mode locks everyone else out for the duration of the operation, making it safe to apply the password.
How to set the database password step by step
Close the database completely if it is currently open. You cannot switch to Exclusive Mode while it is already open in normal mode.
Open Microsoft Access. On the start screen, click File → Open → Browse and navigate to your database file — but do not double-click to open it yet.
Single-click the file to select it. Now look at the Open button at the bottom right of the dialog — click the small dropdown arrow next to it. From the dropdown menu, choose “Open Exclusive”.
The database opens in Exclusive Mode. Now go to File → Info in the ribbon. You will see the option “Encrypt with Password”. Click it.
The Set Database Password dialog appears. Type your password in the Password field, then type it again in the Verify field to confirm. Click OK.
You may see a warning about row-level locking. Click OK to dismiss it. The password is now applied. Close and reopen the database — you will be prompted for the password immediately.
Step 2 — Split the Database Into Frontend and Backend
🗂️ Layer 2: Architecture Protection
Once your database has a password, the next step is to split it into two separate files. This is one of the most important architectural decisions in Access development, and it is something most beginners never do — which leaves their data unnecessarily exposed.
Here is the concept:
- Backend file (
YourDB_be.accdb) — contains all the tables and raw data only. This file sits on a server or shared network location. Users never open it directly. - Frontend file (
YourDB.accdb) — contains all the forms, queries, reports, macros, and VBA code. This is what users actually work with. It connects to the backend tables over a link.
How to split the database using the built-in wizard
Open your database in Access. In the ribbon, go to the Database Tools tab.
In the Move Data group, click “Access Database”. This launches the Database Splitter wizard.
Click “Split Database”. Access will ask you where to save the new backend file. Choose a location — ideally a secure network folder — and give it a name ending in _be (for example, Inventory_be.accdb). Click Split.
Access moves all tables to the backend file and replaces them in the frontend with linked table references. You will see a small arrow icon next to each table name in the navigation pane — this means the table is linked, not stored locally.
Click OK when the wizard confirms the split is complete. Your frontend now connects to the backend automatically every time it opens.
Step 3 — Link the Password-Protected Backend Tables
🔗 Layer 3: Secure Table Linking
Now that the database is split, the next step is to add a password to the backend file specifically. This is where your data lives — and it needs its own password protection, separate from the frontend.
Follow the same Exclusive Mode process from Step 1 — but this time, open the backend file (_be.accdb) exclusively and set its password. Once the backend is password-protected, the frontend needs to be updated to connect using that password.
How to re-link tables to a password-protected backend
Open the frontend file. In the navigation pane, you will notice the linked table icons may now show an error (a warning icon) because the backend is now password-protected and the existing links do not carry the password.
Go to External Data → Linked Table Manager in the ribbon. The Linked Table Manager shows all the tables currently linked from the backend.
Go to External Data → Linked Table Manager in the ribbon. The Linked Table Manager shows all the tables currently linked from the backend.
Access will prompt you to enter the backend file password. Type the password you set in the previous step and confirm. Access will re-establish all the links with the password embedded in the connection.
Once re-linked, the frontend opens and connects to the password-protected backend seamlessly. Users of the frontend will never see the backend password prompt — it is stored securely in the link definition.
Drawback — The Table Import Problem
⚠️ Known Limitation
Here is an important limitation of the password-protection approach that the video covers honestly — and that you need to understand before relying on this method alone.
When Access stores the linked table connection in the frontend, it keeps the backend file password embedded in that link definition. This is what allows the frontend to connect automatically without asking the user for the backend password every time. However, it also means that someone with access to the frontend can use that embedded connection to import the backend tables directly into a new, blank Access database.
How this exploit works
An attacker creates a new blank Access database.
They go to External Data → Import & Link and choose to import from an existing Access database.
They point it to your frontend file — the one that has the linked tables. Because the link definition inside the frontend carries the backend password, Access uses it automatically.
All backend tables — including their data — are now imported into the new blank database without any password prompt.
🚫 What this means in practice
- Password-protecting the backend alone does not fully protect against a determined user who has the frontend file
- The embedded password in the link definition is not visible to normal users — but it can be exploited through the import process
- This is why password protection alone is never sufficient — it must be combined with the object-hiding and ACCDE layers described below
Step 4 — Hide the Navigation Pane and All Objects
🗂️ Layer 4: Interface Lockdown
The navigation pane on the left side of Access shows every table, query, form, report, macro, and module in your database. For a finished application that you are distributing to users, this pane should be completely hidden. Users should only ever see the forms you have designed — nothing else.
Hiding the navigation pane serves two purposes: it creates a cleaner, more professional application interface, and it prevents casual users from directly accessing tables, running raw queries, or modifying your objects.
Method A — Hide via Access Options (Application-Level)
With your database open, go to File → Options. The Access Options window opens.
Click Current Database in the left panel. This section controls settings that are specific to this database file.
Under the Navigation section, uncheck “Display Navigation Pane”. This hides the entire left panel when the database opens.
While in the same section, also set a Display Form under Application Options — this is the form that opens automatically when the database starts, so users land directly in your application instead of a blank screen.
Click OK. Close and reopen the database. The navigation pane is now gone — users see only your startup form.
Method B — Hide individual objects inside the navigation pane
For extra control, you can also hide individual objects — specific tables, queries, or forms — within the navigation pane itself. This is useful if you want to hide certain developer objects while still showing the navigation pane.
Right-click the object you want to hide in the navigation pane and select “View Properties” (or “Object Properties” in older versions).
Check the “Hidden” checkbox and click OK. The object disappears from the navigation pane.
To verify, right-click the top of the navigation pane and choose Navigation Options. Make sure “Show Hidden Objects” is unchecked. If it is checked, hidden objects are still visible to all users.
The F11 Key Problem
⚠️ Known Limitation
You have now hidden the navigation pane. You feel secure. But there is a problem — a single keystroke undoes all of it.
Pressing F11 on the keyboard toggles the navigation pane open and closed in Microsoft Access. This is a built-in keyboard shortcut that has been in Access for decades. Any user — even without any Access knowledge — can accidentally or intentionally press F11 and bring back the entire navigation pane, making every table, query, and form visible again.
The good news is that this is also solvable — but the solution lives in the next layer: the Shift key bypass method and how to disable it. The F11 problem is essentially a sub-problem of the same root cause, which we address below.
The Shift Key Bypass — and How to Block It with VBA
🔧 Advanced Fix
There is a second, even more powerful bypass that is built directly into Microsoft Access and has been there since the early versions. When you open an Access database while holding down the Shift key, Access ignores all your startup settings entirely.
This means: no startup form, navigation pane fully visible, all objects accessible, all your security settings bypassed — with a single keyboard shortcut that takes less than a second. Any experienced Access user knows this trick. It is documented publicly. And by default, it works on every Access database.
What the Shift key bypass disables
- Your startup form — the database opens to a blank screen with the full navigation pane
- Your hidden navigation pane setting — it appears with all objects visible
- Your hidden objects — depending on settings, they may become accessible
- Any AutoExec macros you have set to run on startup
- Your entire application interface — bypassed completely
How to disable the Shift key bypass using VBA
Access does not provide a checkbox or menu option to disable the Shift bypass. You have to do it through a small piece of VBA code that modifies the database’s startup properties. Here is the process:
Open your database. Press Alt + F11 to open the VBA editor (the Visual Basic for Applications window).
In the VBA editor, go to Insert → Module to create a new standard module.
Copy and paste the following procedure into the module:
Sub DisableShiftBypass() Dim db As DAO.Database Dim prop As DAO.Property Set db = CurrentDb() On Error Resume Next db.Properties("AllowBypassKey") = False If Err.Number <> 0 Then Set prop = db.CreateProperty("AllowBypassKey", dbBoolean, False) db.Properties.Append prop End If MsgBox "Shift bypass has been disabled."End Sub
Place your cursor anywhere inside the procedure and press F5 to run it. You will see a confirmation message box when it has completed successfully.
Close the VBA editor and save your database. The Shift key bypass is now disabled. From this point on, holding Shift while opening the database has no effect — your startup settings are enforced every time.
Intro to ACCDE — The Final Layer of Protection
🛡️ Layer 5: Code and Design Lock
Even with all the layers applied so far — database password, split architecture, password-protected backend, hidden navigation pane, and Shift bypass disabled — there is still one significant gap: your VBA code and form designs are still visible and editable.
If someone opens your database (having entered the password), they can still press Alt + F11 to open the VBA editor and read every line of your code. They can right-click a form and open it in Design View, seeing exactly how you built it. All your intellectual property — the logic, the automation, the custom functions — is exposed.
This is where ACCDE comes in. Converting your database to an ACCDE file is the step that locks all of this down permanently.
What ACCDE does
- Compiles all VBA code and removes the source code from the file — users can run the code but cannot read, edit, or copy it
- Locks all forms and reports — Design View is completely disabled for every form and report in the database
- Removes module editing — the VBA editor cannot be used to view or modify any procedures
- Slightly improves performance — compiled code runs faster than interpreted source code
- Reduces file size — source code removed from the compiled binary reduces the overall file footprint
What ACCDE does NOT do
- It does not prevent users from opening or reading tables directly via the navigation pane
- It does not add a password to the file — the file still opens without a password unless you added one separately
- It does not prevent the import exploit described in Step 3 — that still requires the navigation pane to be hidden and the Shift bypass disabled
The full process of creating and working with ACCDE files — including how to combine it with all the previous security steps — is covered in detail in the next video in the SkillHeader Security Series.
Full Security Process Summary
Here is the complete layered security process from this video, in the order you should apply it:
Set database password in Exclusive Mode
Encrypts the file with AES-256. Nobody can open it without the password. Apply to both frontend and backend.
Split into frontend and backend
Separates data from interface. Users get the frontend; the raw data file stays on a controlled location.
Password-protect the backend and relink tables
Backend data is encrypted. Frontend re-links with embedded password — users never see a backend prompt.
Understand the import drawback
The embedded link password can be used to import tables via a new blank database. Address this with the next layers.
Hide the navigation pane and all objects
Users see only your application interface. Tables, queries, and code are not visible in normal use.
F11 and Shift bypass — both expose your objects
F11 toggles the nav pane. Shift key bypasses all startup settings. Both must be addressed.
Disable the Shift bypass with VBA
Set AllowBypassKey = False in a VBA module. Run it once. Shift key no longer bypasses your startup settings.
Convert to ACCDE before distributing
Locks VBA code and form designs permanently. No Design View, no code reading. Compile fresh for every release.
| Security Layer | Blocks file opening | Encrypts data | Hides objects | Locks code |
|---|---|---|---|---|
| Database password (Exclusive Mode) | Yes | Yes | No | No |
| Split + password-protected backend | Partial | Yes | No | No |
| Hidden navigation pane | No | No | Partial | No |
| Shift bypass disabled (VBA) | No | No | Yes | No |
| ACCDE conversion | No | No | Partial | Yes |
| All layers combined | Yes | Yes | Yes | Yes |
Frequently Asked Questions
What happens if I forget to open in Exclusive Mode before setting the password?
The “Encrypt with Password” option will be greyed out in the File → Info menu. Access will not let you set a password on a database that is open in shared mode. Close it, reopen it using “Open Exclusive” from the Open dialog dropdown, and the option will become available.
Can the Shift key bypass still work after I disable it with VBA?
No — once you set AllowBypassKey = False and save the database, the Shift key has no effect when opening. The bypass is completely blocked. The only way to re-enable it is to run the VBA code again with the value set back to True — which requires opening the database and accessing the VBA editor, which requires the password.
Does hiding the navigation pane affect how my forms and queries work?
Not at all. Hiding the navigation pane is purely a visual change. All your forms, queries, reports, and macros continue to function exactly as before — they just are not listed visibly for users to click on directly. Your code can still open any form, run any query, and call any function normally.
Why should I split the database if I am only sharing it with one or two people?
Even with a small team, splitting is good practice for two reasons: it allows you to update the frontend (fix bugs, change the interface) without touching the data, and it keeps the raw data file in a controlled location separate from the application code. It also makes moving to a SQL Server backend much easier when your team grows.
Is the ACCDE conversion covered in this video?
The video introduces ACCDE as the next security step and explains what it does — but the full ACCDE process is covered in the next video in the SkillHeader Security Series. This video focuses on building the foundation: password, split, hiding, and Shift bypass — before ACCDE is applied on top.
What if a user already knows the database password and the Shift bypass is disabled — can they still see the VBA code?
Yes — if you have not yet compiled to ACCDE. In a regular .accdb file, pressing Alt + F11 opens the VBA editor where all your code is readable. This is why ACCDE conversion is the essential final step — it permanently removes the source code from the distributed file so it cannot be read even by someone with full password access.