Walk into any clinic, hotel, school, or small business office and the first person you meet is the receptionist. They greet you, take your name, note the time, log your details, and move on to the next person — all within a minute or two. What happens behind that desk, though, matters more than it looks. If a patient’s record goes missing, if a visitor’s details are logged incorrectly, or if there’s no way to look up who came in last Tuesday — things break down fast.
Most front desks still handle this with paper registers, scattered spreadsheets, or nothing at all. This single YouTube video from SkillHeader shows a better way. Titled “Reception Front Desk Record Keeping Database System in MS Access,” the tutorial walks you through building a clean, functional reception database entirely in Microsoft Access — one that’s fit for a medical clinic but adaptable to almost any front desk environment.
This post covers what the video builds, why this kind of system matters, the structure behind it, and a step-by-step look at how it all comes together.
What the Video Is About
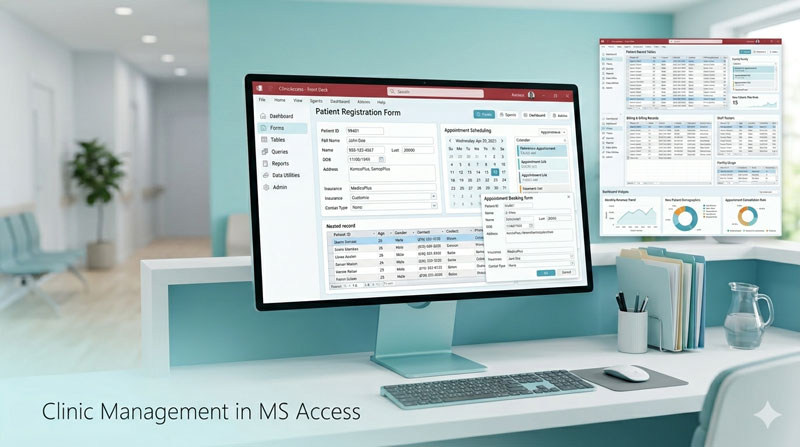
The video presents a complete, working reception database system designed for a medical clinic — specifically to register and track patient visits at a front desk. The system is built from scratch in Microsoft Access and includes three core components that work together: a secure login system so only authorized staff can access the records, a main dashboard that shows today’s patient list at a glance, and a data entry form where receptionists can quickly add new patient records.
The end result is a neat, practical tool that a real clinic or small office could use from day one. And because the design is intentionally simple, the same template can be repurposed for a hotel check-in desk, a school visitor log, a customer service counter, or any environment where people arrive and need to be recorded.
Why Every Front Desk Needs a Proper Record-Keeping System
It’s easy to underestimate how important the front desk is to an organization’s operations. It’s the first point of contact, and everything that happens there — every name, time, fee, and appointment — feeds into decisions made later. When that process runs on handwritten notes or informal spreadsheets, problems build up quietly until they become visible crises.
Here’s what a structured, database-driven system actually changes:
The Importance of Getting This Right in Healthcare and Service Environments
In a medical setting, the stakes are higher than in most other front desk environments. A patient who arrives for a follow-up appointment needs their previous visit on record. A clinic that bills patients needs accurate fee logs. A hospital with multiple reception staff needs to know who registered which patient and at what time.
Even outside healthcare, the principle is the same. A school with unauthorized visitors, a hotel with no check-in log, a company with no record of who entered the premises — these are not just operational inconveniences. They’re security and compliance risks.
The system built in this video addresses all of these concerns in a format that’s accessible to any organization running Microsoft Access. You don’t need enterprise software or a dedicated IT team. You need a well-designed database and a few hours to set it up.
The Structure of the System
The system is built around three main components: a database table, a main dashboard form, and a data entry form. A login system sits in front of all of it as a secure gateway.
The Patient Table — The Foundation
Everything in the system comes back to the patient table. It’s the single source of truth for all records. The table is designed with ten fields covering every piece of information the front desk needs to capture:
A unique auto-numbered Patient ID is assigned to each record automatically. The date and time of the visit are captured separately — both formatted correctly and pre-filled with the current date and time as their default values, so the receptionist doesn’t have to type them manually. First name and last name are stored in separate fields so records can be sorted or searched by either. Gender is stored as a short text field, set up as a dropdown in the form. Age and address round out the personal details. Phone number is stored as short text (not a number field) so it handles leading zeros and formatting correctly. Finally, a fee field with currency formatting records the consultation or service charge.
The table is created in Design View, with the ID field set as the primary key. Date, time, and currency fields have their formats applied at the table level, which means correct formatting carries through automatically to any form or report built from the table.
| Field Name | Data Type | Description |
|---|---|---|
| pid | AutoNumber | Patient ID |
| pdate | Date/Time | Date |
| ptime | Date/Time | Time |
| pfirstname | Short Text | First Name |
| plastname | Short Text | Last Name |
| pgender | Short Text | Gender |
| page | Number | Age |
| paddress | Long Text | Address |
| pphone | Short Text | Phone |
| pfee | Currency | Fee |
The Login System — The Front Door
The system uses the Ultimate Login System built in a separate SkillHeader project as its authentication layer. When the application opens, the login form appears first. Only after entering valid credentials does the receptionist get access to the main dashboard.
This is more than just a nice feature — it’s essential for a shared environment. Multiple receptionists working different shifts each have their own username and password. Their entries can be tracked, their access can be revoked if they leave, and the database is protected from being opened by unauthorized staff. The login form also includes a logout button on the main dashboard, so sessions can be properly closed between shifts.
The Main Dashboard — The Daily View
The main dashboard is the central working screen for the receptionist. It’s built as a two-part form: a header section at the top with the title, an “Add New Patient” button, and an optional logout button; and a subform in the body that displays patient records in a continuous (list) view.
The subform’s record source is linked to a query rather than directly to the patient table. That query filters records by today’s date using Access’s built-in Date() function. This means when the receptionist opens the application every morning, they automatically see only today’s patients — not hundreds of historical records from weeks or months past. Historical records are still accessible by removing the date filter or running a separate search, but the default view stays practical and focused.
The subform is set to continuous form view, which means records stack vertically in a list format — ideal for quickly scanning who has already checked in.
The Data Entry Form — Adding New Records
When the receptionist clicks the “Add New Patient” button, a separate data entry form opens in dialog mode. This is a deliberate design choice. Dialog mode means the receptionist must complete or close the entry form before returning to the dashboard — it prevents accidentally navigating away mid-entry and leaving an incomplete record.
The entry form is built as a bound form with its record source set to the patient table. Every field in the form corresponds directly to a column in the table, so data flows straight into the database on submission.
The form includes all ten fields: date (pre-filled with today’s date), time (pre-filled with the current time), first name, last name, gender (as a dropdown), age, address, phone, and fee. These pre-filled defaults mean the receptionist only needs to fill in the patient-specific details — name, gender, age, contact information, and fee — and can leave date and time as-is unless something needs correcting.
At the bottom of the form sits a Submit button. When clicked, it saves the record, closes the entry form, and immediately refreshes the dashboard subform to show the newly added patient. The refresh is handled with a single line of VBA that calls Requery on the subform — a small but important detail that keeps the display current without the receptionist needing to close and reopen anything.
Submit button Code:
Private Sub btn_submit_Click()

DoCmd.Close acForm, "EntryForm", acSaveYes
Forms!MainForm![tbl_patient subform].Form.Requery

End Sub
Step-by-Step: How to Build It
Here is the complete process from start to finish, in plain terms:
Step 1 — Create the Patient Table. Open a new Access database and create a table in Design View. Add the ten fields described above. Set pid as the AutoNumber primary key. Apply Date/Time formats to the date and time fields, and set their default values to Date() and Time() respectively. Set the fee field to Currency. Save the table.
Step 2 — Add Sample Records. Enter a few rows of test data so you have something to see when you build the forms.
Step 3 — Integrate the Login System. Import or build the login form and user table from the Ultimate Login System project. Set the login form as the application’s startup form so it opens first. Configure the login button to open the main dashboard on successful authentication and the logout button to close the dashboard and return to the login form.
Step 4 — Build the Date Query. Create a query based on the patient table. In the criteria row of the date field, enter Date(). This query will only return records from today. Save it — this query will be the record source for the dashboard subform.
Step 5 — Build the Main Dashboard Form. Create a new blank form. Add a form header with a title label, an “Add New Patient” button, and a logout button. In the detail section, add a subform control and set its source object to the date query created in the previous step. Set the subform’s default view to Continuous Forms. Name the subform control so the VBA code can reference it.
Step 6 — Write the Add New Patient Button Code. In the On Click event of the button, add the VBA code that opens the entry form in acDialog mode.
Step 7 — Build the Data Entry Form. Create a new blank form. Set its record source to the patient table. Add bound text boxes for all ten fields. Set the default values for date and time at the form level if they weren’t set at the table level. Add a Submit button.
Step 8 — Write the Submit Button Code. In the On Click event, add the code that saves the record with acSaveYes, closes the entry form, and calls Requery on the dashboard’s subform to refresh the list.
Step 9 — Test the Full Workflow. Open the application, log in, confirm the dashboard shows today’s records, add a new patient through the entry form, confirm the record appears in the list immediately after submission, and test the logout flow.
Adapting the System Beyond Healthcare
One of the most practical things about this project is how easy it is to repurpose. The patient table fields can be renamed and adjusted in about ten minutes to fit a completely different context.
For a hotel, swap patient details for guest name, room number, check-in and check-out times, and room rate. For a school, track visitor name, purpose of visit, the staff member they’re meeting, and time in and out. For a business office, log client name, company, the department they’re visiting, and appointment time. The underlying structure — a secure login, a live dashboard showing today’s activity, and a quick-entry form that refreshes the list on submit — works exactly the same way in any of these environments.
Final Thoughts
A front desk is where first impressions are made and where the first data about every visitor or client enters your organization. Building that process on paper or rough spreadsheets means that data is unreliable from the start.
This video shows that it doesn’t take much to do it properly. A well-designed table, a clean dashboard that shows what matters right now, a fast entry form, and a login system to control access — that’s the entire system. It takes a few hours to build and delivers something genuinely useful that any front desk team can operate without training.
If you work with Microsoft Access or manage a small organization that currently handles visitor records manually, this is one of the most practical and immediately applicable projects you can build.
Watch the full video here: Reception Front Desk Record Keeping Database System in MS Access, and download the practice files at skillheader.com.
FAQs
Can I use the same front desk template for other environments like school, hotel, or customer dealing?
Yes, because it is just a simple initial data entry for record keeping.
How to handle multiple receptionists in an organization with an 8-hour duty interval for each user?
All users should have their own login, so that user entries can also be monitored.
Can a front desk reception record-keeping system integrate with other management software?
Yes, it can be integrated with other database software to get end-to-end results.